We're about to have both a 9 volt battery and a connection to our expensive laptop on our breadboard at the same time. And there's some safety concerns that go along with that. You do not want to accidentally connect 9 volts DC directly into your laptop's headphone jack, it could damage it.
The solution is a simple "safety circuit" which I've been using for so long, I literally forgot how the math of it works. But it works. You'll listen to my explanation of what it does, you'll plug it in, and your laptop will be safe.
Before I show you the actual circuit and how to plug it in, here's a little explanation of a capacitor, the crucial piece in our safety circuit. Don't follow along with this video, since there's some safety issues here that you don't know about yet. But make sure you understand what's happening in the video, and why it's so important.
The capacitor is the crucial component is nearly all analog filters and tone sculpting circuits. The entire next chapter will be all about using them.
In the meantime, all you need to know is that they block DC, while allowing AC through.
Thus if you accidentally plug a DC voltage into the wrong place in your circuit, a correctly placed "safety circuit" with a capacitor and a resistor will prevent that DC voltage from getting to your expensive laptop's headphone jack circuitry, which could otherwise damage it.
It's really simple, you just plug a circuit with the right capacitor and resistor into your audio jack, and you no longer have to worry about the safety of your laptop or other expensive audio outputting device. In the next chapter on capacitors we will probably get into the math of how we choose the values we do.
Before I show you how to wire that up on your breadboard, now seems like a good time to review how to use the oscilloscope, since we're about to start using it again.
Here is the sine wave generator we'll be using.
Now let's plug our audio input jack back in, and make sure audio is getting into our breadboard.
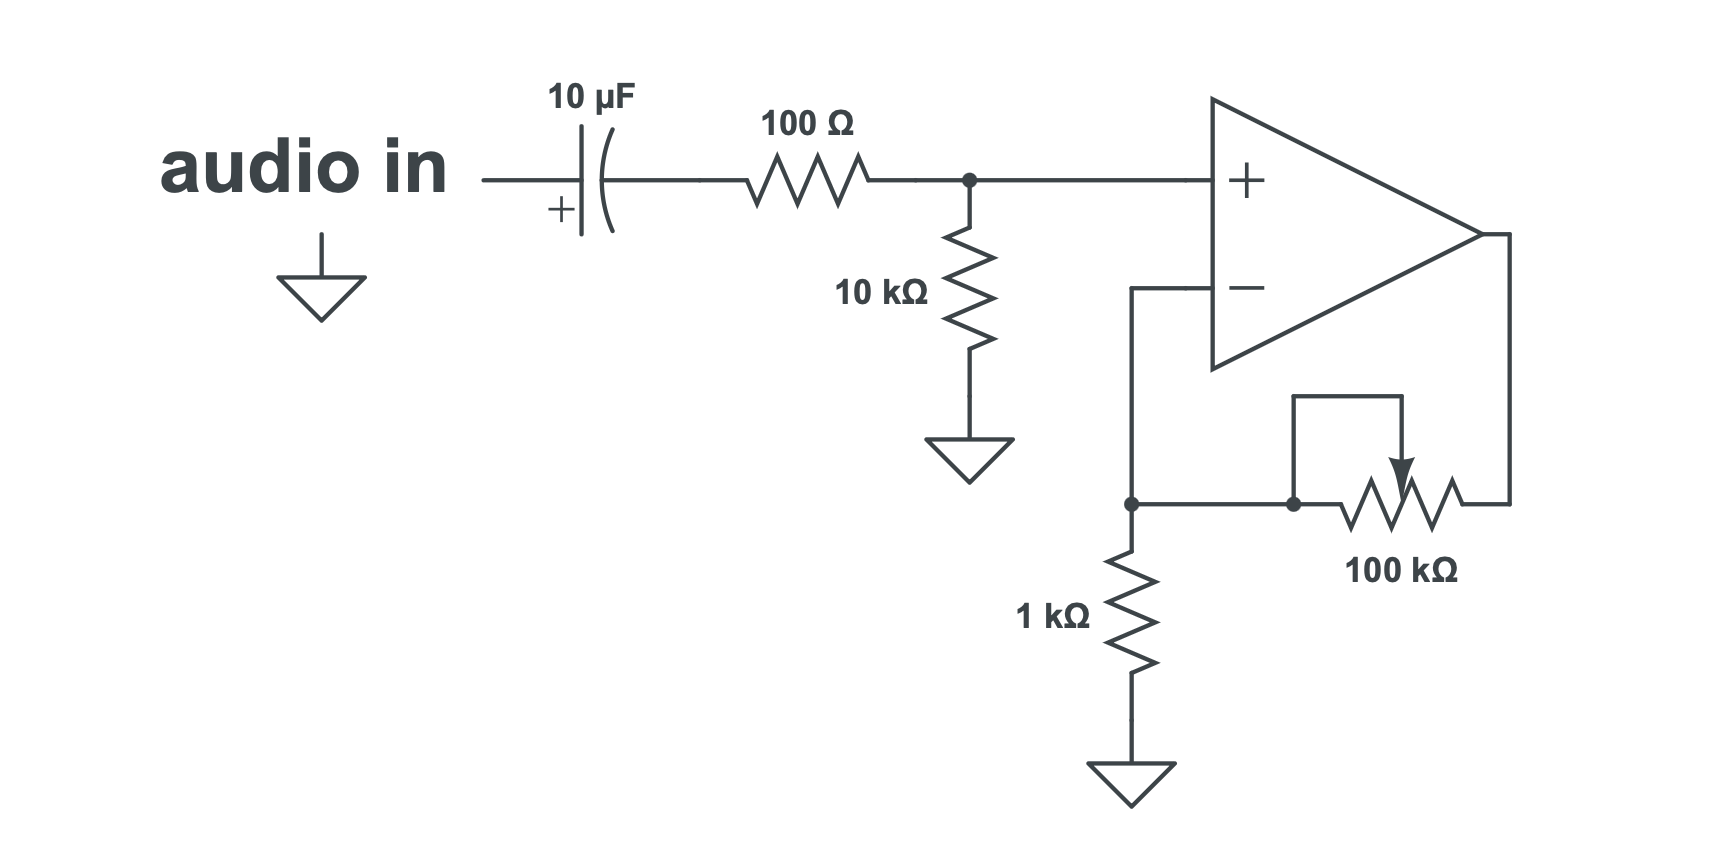
And now, the safety circuit which I've been using in virtually all of my circuit designs for at least the past decade, and which my students have also been using for that time.
Note that in the schematic above, the op amp says TL072 on it. That's my mistake. TL072 is the other op amp we're going to use later, but you should still be using the LM358.